 how-to
7 Steps to Manage Peptide Shelf Life After Reconstitution
Last Updated: 1 November 2026
Quick Summary
Peptide shelf life after reconstitution is shorter and less predictable than for the dry powder, so plan storage from the start. Follow the supplier's stated storage conditions, keep the solution cold, aliquot to avoid repeated freeze-thaw cycles, and label every vial with a discard date.
- Reconstituted peptides are far more exposed to degradation than the dry lyophilised powder.
- Check the batch number on the COA matches the vial label before you begin.
- Aliquot reconstituted solution into single-use portions to limit freeze-thaw cycles.
- Label each vial with reconstitution date, concentration, storage location and discard date.
- Replace material after a temperature excursion if your work depends on accuracy.
Table of Contents
- What Happens to a Peptide Once It Is Reconstituted
- Step 1: Check the Supplier's Stated Storage Conditions and COA
- Step 2: Set the Peptide Storage Temperature Before Reconstitution Begins
- Step 3: Work Out How Long Peptides Last After Reconstitution
- Step 4: Limit Peptide Freeze-Thaw Cycles by Aliquoting
- Step 5: Label Every Vial With Handling and Expiry Information
- Step 6: Recognise Signs of Degradation and Handle Temperature Excursions
- Building a Storage Log for Your Reconstituted Peptides
- Frequently Asked Questions
What Happens to a Peptide Once It Is Reconstituted
Reconstitution changes the stability of a peptide in a way many researchers underestimate, and the same is true of peptide shelf life more generally. A lyophilised powder is dry and tends to keep well for a long time when stored correctly. Once you add a diluent, the peptide is in solution, and it becomes far more exposed to degradation.
In solution, peptides can break down through several routes. Hydrolysis can cut peptide bonds, oxidation can affect sensitive residues, and aggregation can reduce the amount of active material. Each route speeds up with heat, light, repeated handling and the wrong pH.
The practical point is simple: a reconstituted peptide has a shorter, less predictable usable period than the dry powder. Plan your storage around that from the start.
Step 1: Check the Supplier's Stated Storage Conditions and COA
Start before the vial arrives. Read the storage conditions on the product information and the batch-specific Certificate of Analysis (COA). Look for the recommended temperature, light protection and any stated handling limits.
Check that the batch number on the COA matches the label on your vial.
- Note the recommended storage temperature for the dry form
- Note any reconstitution or post-reconstitution guidance
- Confirm the batch number matches the vial label
- Record the expiry or retest date printed on the COA
Step 2: Set the Peptide Storage Temperature Before Reconstitution Begins
Decide where the peptide will live before you open it. Prepare a storage slot in a refrigerator or freezer that holds a steady temperature. Frequent door opening causes temperature swings, so choose a spot away from the door.
Many laboratories store reconstituted solutions refrigerated, and many store aliquots frozen. The right choice depends on how long you need the material and what the supplier's documentation says. Check the stated conditions rather than assuming one default.
Watch out: A fridge door shelf can warm each time the door opens. Keep the vial in the body of the unit.
Step 3: Work Out How Long Peptides Last After Reconstitution
Many guides give a single number for how long a reconstituted peptide lasts. Treat any such figure as a starting point, not a guarantee, because peptide shelf life depends on the peptide sequence, the solvent, the concentration, the pH and the storage temperature.
Work from the supplier's documentation first. If the COA or product information gives a post-reconstitution window, follow it. If it gives no window, plan conservatively and test or replace the material sooner.
Why Stated Shelf-Life Windows Carry Uncertainty
Shelf-life windows are estimates built on limited stability data. They describe how a peptide behaved under specific conditions, not how every vial will behave in your lab. A window that looks precise may still hide wide variation between sequences and storage setups.
This is why you should not treat a stated window as proof. Record the reconstitution date, watch for visible changes and, where your work depends on potency, verify activity with a suitable analytical method before relying on older solutions.
Step 4: Limit Peptide Freeze-Thaw Cycles by Aliquoting
Repeated freezing and thawing damages many peptide solutions. Each cycle adds stress, and small amounts of degradation build up. The simplest fix is to aliquot.
Divide the reconstituted solution into single-use portions immediately after preparation. Then freeze only the portions you will not use within the short term, and thaw one aliquot at a time.
- Use small, tightly closed storage vials sized for one experiment
- Label each aliquot with the peptide name, concentration and date
- Thaw only the aliquot you need, then discard any leftover volume
- Avoid refreezing a thawed aliquot
Step 5: Label Every Vial With Handling and Expiry Information
Good labels prevent errors that ruin a study, but a label is only useful if it distinguishes between the different dates that matter. Many researchers conflate three separate concepts: the manufacturer's expiry date, any stability claim the manufacturer makes about the product in its dry form, and the after-reconstitution use period you assign once the vial is in solution.
Expiry date is the date printed by the manufacturer on the vial or certificate of analysis. It applies to the product as supplied, in its original container and under the stated storage conditions. It does not tell you how long the peptide remains usable once you have added a diluent.
Manufacturer stability claim is any statement in the product information or COA about how long the reconstituted solution remains stable under specified conditions. This may be a validated in-use period or a general estimate. Treat it as product-specific guidance, not a universal rule.
View the complete research peptide catalogue →
After-reconstitution use period is the discard date you assign based on the supplier's documentation, your own storage conditions and the sensitivity of your work. If the supplier gives no post-reconstitution window, set a conservative discard date and record your reasoning.
A complete label should therefore show:
- Peptide name and batch number
- Concentration and diluent used
- Reconstitution date and time
- Storage temperature and location
- The discard date you have calculated, clearly marked as your assigned after-reconstitution period
- Your initials or a unique identifier
Use a label that survives cold storage and does not smudge. Cryogenic labels or permanent marker on freezer-safe tape are common choices. Avoid labelling only the cap, as caps can be swapped between vials.
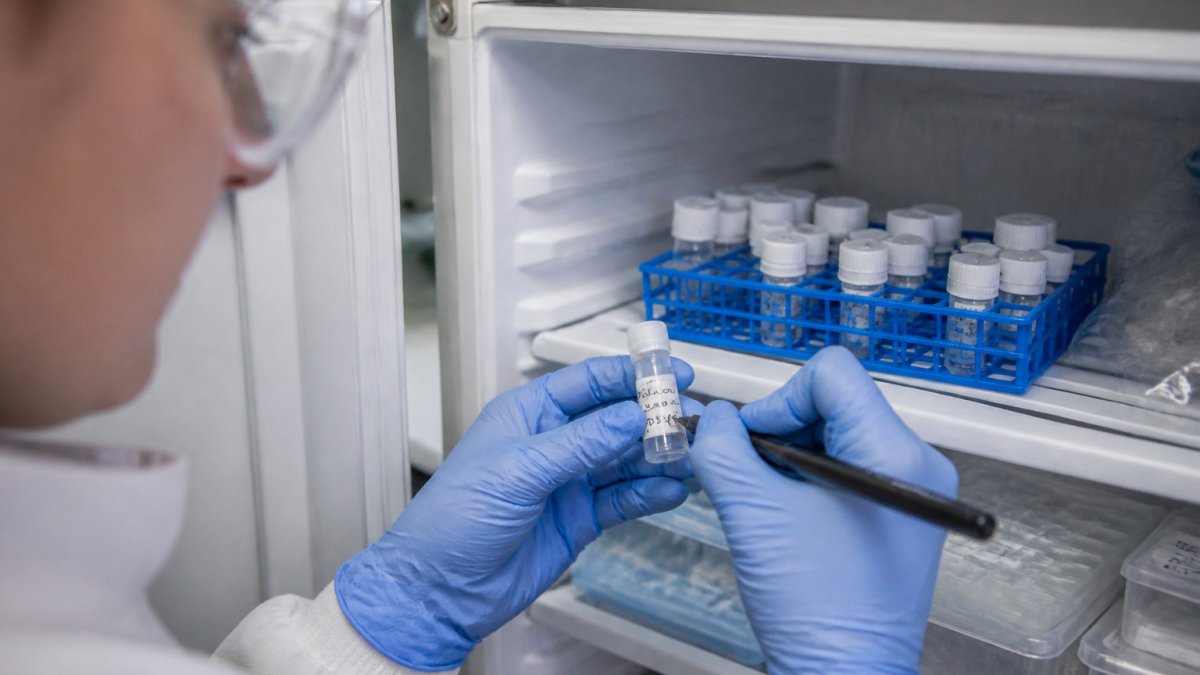
A researcher in a UK university laboratory wearing nitrile gloves writes a reconstitution date on a small labelled storage vial beside a rack of vials in a refrigerator.
Read more about how to record handling details: Laboratory chemical storage best practices. Sound storage routines also depend on how well your labels hold up over time. Five practical ways to prevent peptide oxidation during storage cover further steps you can take to protect the material once it is in solution.
Step 6: Recognise Signs of Degradation and Handle Temperature Excursions
Inspect solutions before each use. Look for cloudiness, particles, colour change or unexpected precipitate. Any of these signs means the material may no longer be reliable, and it should be set aside rather than used. Visual checks catch gross problems, not all degradation, a clear solution can still have lost potency.
Contamination is a separate risk from degradation. Practical steps reduce it:
- Work on a clean, disinfected surface and wear gloves.
- Swab vial septa with an appropriate disinfectant before and after access.
- Use a fresh needle and syringe for each vial or aliquot; never reuse a needle.
- Avoid touching the needle or the vial opening.
- Keep vials closed when not in active use and do not leave them open to the air.
- Never return unused solution to the original vial.
- Label and store aliquots separately to avoid cross-contamination between batches.
Temperature excursions need a quick, documented decision. The right response depends on the product, the duration and the temperature reached. A common pattern is:
- Record the event. Note the time, the temperature reached, and how long the vial was outside its stated range.
- Check the supplier's guidance. Some COAs or product information give specific advice on excursions; follow it where it exists.
- Assess the risk. Brief excursions at the upper end of the refrigerator range are usually lower risk than prolonged room-temperature exposure or accidental freezing of a solution intended for refrigeration.
- Decide. If your work depends on accuracy, replace the material rather than assume it is unaffected. If the material is for non-critical use, mark the vial and use it sooner rather than later.
- Update the log. Record the decision and the reason.
Compare your storage options with the wider cold-storage picture: Peptide storage conditions vs freezer temperature compared. Knowing how each setting behaves helps you choose the right one.
Watch out: A vial that looks clear can still have lost potency. Visual checks catch gross problems, not all degradation.
The article sets out a short sequence of checks and decisions to make when a reconstituted peptide may have degraded or been exposed to the wrong temperature.
| Step | What to do | Timing |
|---|---|---|
| Inspect solution | Look for cloudiness, particles or colour change | Before each use |
| Record excursion | Note time, temperature reached and duration | Immediately |
| Check supplier guidance | Follow any excursion advice on the COA or product information | At the time of the event |
| Assess risk | Weigh brief high-range exposure against prolonged or accidental freezing | After the event |
| Decide | Replace material if work is sensitive; use non-critical material sooner | Same day |
| Update the log | Record the decision and the reason | Immediately after deciding |
Building a Storage Log for Your Reconstituted Peptides
A written log turns these steps into a routine you can audit. Record each reconstitution, each aliquot, each temperature check and each discard. Review the log before every experiment.
Keep the log in one place, either on paper or in a shared spreadsheet. Include the batch number, dates, storage location, aliquot count and any excursions. When a result looks wrong, the log tells you whether storage could be the cause.
For a wider view of storage routines, see Is lyophilised peptide storage worth the cost? This helps you decide how much of your stock to reconstitute at once.
Frequently Asked Questions
How long can a peptide be stored after reconstitution?
The usable period depends on the peptide's sequence, the diluent used, the storage temperature and how often the vial is opened. JGPep+ does not publish a universal shelf-life figure for reconstituted material, because stability is product-specific. Check the batch-specific Certificate of Analysis and any stated storage guidance for your product, and record the reconstitution date on the label. Where no validated data exist for your product and conditions, treat the solution as short-term material and verify its integrity with an appropriate analytical method before relying on it in experiments.
Can reconstituted peptides be frozen?
Freezing can extend storage for some peptides, but it is not suitable for every product and every diluent. Repeated freezing and thawing can cause aggregation, adsorption to container walls and loss of integrity. Aliquoting into single-use volumes before freezing reduces repeated thawing of the stock. Confirm freezing suitability against the product documentation, and where in doubt, run a stability check before committing valuable material to frozen storage.
How can you tell whether a reconstituted peptide may have degraded?
Visual checks such as cloudiness, colour change, particulates or unexpected precipitation can indicate a problem, but a clear solution does not prove stability. Peptides can lose activity or purity without visible change. Compare results against a reference standard or a retained sample, review the handling history against the storage log, and use an analytical method such as HPLC if the material underpins a publishable result. Discard material when integrity cannot be confirmed.
What information should be recorded on a reconstituted peptide label?
Record the product name and catalogue reference, batch number, reconstitution date, diluent and volume, nominal concentration, aliquot number, storage temperature and the assigned use-by date from your own stability assessment. Add your initials or user ID so that handling can be traced. Clear labels support traceability in UK research governance and prevent the use of expired or mislabelled material in analytical work.